


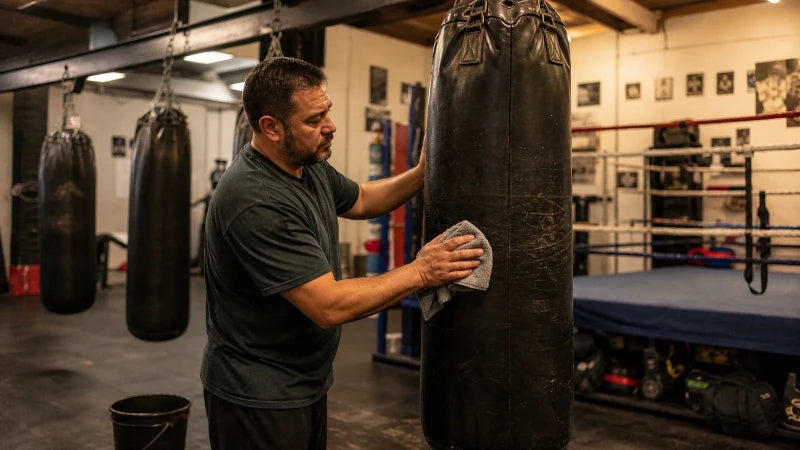
Wipe sweat and surface dirt off your punching bag after training, let it dry with moving air, and inspect the shell and hanging points before the next hard session.
That simple routine does most of the work. The part that changes is the cleaner: leather, synthetic shells and canvas should not all be treated the same way.
Quick cleaning guide by material
| Outer material | Routine care | Avoid |
|---|---|---|
| Genuine leather | Wipe with a soft, slightly damp cloth; use a leather cleaner or conditioner only when approved for the product. | Soaking, harsh detergent, bleach, alcohol-heavy cleaners and direct heat. |
| Synthetic leather, vinyl or Syntek | Wipe with a damp cloth; use a small amount of mild soap when the manufacturer permits it, then remove residue and dry. | Abrasive brushes, solvents, heavy saturation and untested disinfectants. |
| Canvas | Brush away loose dirt; spot-clean with a mild solution approved for the fabric and let it dry fully. | Soaking the fill, sealing the bag while damp and aggressive scrubbing at seams. |
After every training session
- Remove gloves, wraps and anything resting against the bag.
- Wipe visible sweat and grime from the striking surface.
- Use a separate clean cloth to remove soap or cleaner residue.
- Let the shell dry before covering or storing it.
- Look for cuts, loose stitching, peeling, exposed fill or damage around the straps and rings.
Do not leave wet wraps or gloves on top of the bag. They trap moisture exactly where seams and hanging attachments already work hardest.
How to clean a leather punching bag
Start dry. Remove dust with a soft cloth, then wipe the shell with a second cloth that is damp, not dripping.
If the bag needs more than water, use a leather product compatible with the finish and follow its directions. A cleaner made for one type of leather can stain or strip another. Test first.
Conditioner is not a fixed-calendar job. Use it only when the bag maker allows it and the surface needs it. Too much product can leave a slick striking surface and attract dirt.
How to clean a synthetic or vinyl punching bag
Wipe the shell with a soft damp cloth. For stuck-on grime, add a small amount of mild soap to the cloth, clean the area, then wipe again with plain water.
Dry the surface before training. Skip bleach, strong solvents, rough pads and any disinfectant that has not been checked against the material.
How to clean a canvas punching bag
Canvas holds moisture more readily than a smooth shell. Brush or vacuum loose dust first so you do not grind it into the weave.
Spot-clean rather than saturating the bag. Work gently around seams, remove residue and give the shell enough ventilation to dry all the way through.
Check the fill and shape
An unfilled bag can settle as the material compresses. Follow its fill instructions if you need to adjust it. Do not solve every soft spot by pouring in sand. Dense pockets can create hard striking zones and put extra stress on the shell.
Stop and investigate if the bag develops a sudden hard lump, deep hollow, severe lean or exposed filling. The right repair depends on the bag's construction.
Inspect the hanging system
Cleaning the shell while ignoring the mount is half a maintenance routine.
- Check straps for cuts, fraying and damaged stitching.
- Check D-rings, chains, swivels and connectors for bending, cracking, corrosion and unusual wear.
- Confirm locking connectors are closed.
- Look at the mount and the surrounding structure for movement, gaps or cracking.
- Stop training if the bag or mounting system has changed position.
For installation-specific guidance, use the punching bag installation guide.
Store the bag dry
A dry indoor training area is the simplest choice. Keep the bag away from leaks, standing water and prolonged direct sun. Give damp rooms more ventilation instead of chasing an arbitrary humidity number.
If the bag must be removed, support its weight while disconnecting it and store it according to the manufacturer. Do not fold, crush or seal a damp bag in plastic.
Repair or replace?
A cosmetic scuff is different from a structural failure. Stop using the bag when you see:
- a tear that exposes filling
- seams opening under load
- a damaged strap, D-ring or other hanging attachment
- metal hardware that is cracked, bent or badly corroded
- a mount or surrounding structure that moves
- a repair that changes the striking surface into a hard or sharp area
Small shell repairs may be possible with a manufacturer-approved kit. Damage at a load-bearing attachment needs professional or manufacturer guidance, not a strip of general-purpose tape.
A simple maintenance schedule
- Every session: wipe sweat, dry the shell and perform a quick visual check.
- Regularly: inspect seams, attachment points, connectors and the mount more closely.
- After any move, unusual noise or hard impact: stop and inspect the full system before continuing.
- As the material requires: use only the approved cleaner, conditioner or repair method.
Looking at a replacement? The heavy bag buying guide explains bag types, fill and room requirements, while the live punching bag collection shows current options.
The five-minute post-session routine
- Put the gloves and wraps somewhere else; do not stack damp gear on the bag.
- Walk around the bag once and look at the main strike zones, seams and bottom.
- Wipe the shell with the method approved for its material.
- Check the top attachments and make sure every connector is closed.
- Leave the surface exposed to airflow until it is fully dry.
This is deliberately simple. A routine people repeat after every session protects the bag better than an elaborate deep clean done twice a year.
What wear looks like before failure
A shiny or scuffed strike zone can be cosmetic. A seam that opens when the bag swings is not. Fraying where a strap folds, red rust around a connector, a D-ring leaning away from its original position or a new crease beneath an attachment all deserve a stop and closer inspection.
Fill problems also announce themselves. A bag that suddenly develops a hard ledge, a deep waist or a heavy lean may have settled unevenly or taken on moisture. Do not keep hammering the hard area while hoping it redistributes.
Maintenance changes with an unfilled bag
If you filled the bag yourself, keep a note of the material and method used. The Fairtex HB6, for example, is sold unfilled in the current range. If it later settles, that history helps you adjust it according to the product guidance instead of adding random dense material.
After moving an unfilled bag to a new mount or room, inspect the shell and fill again. Transport can shift the packing even when nothing looks damaged from the outside.
Frequently asked questions
Can I use disinfectant wipes on a punching bag?
Only if the bag manufacturer says the wipe is compatible with the shell. Alcohol, bleach and other chemicals can dry, fade or weaken some finishes. Test any approved product on a hidden area first.
How often should I clean my punching bag?
Wipe sweat and visible grime after use. Deep cleaning should follow the actual condition of the bag and the manufacturer's care instructions, not a fixed universal timetable.
How do I get a bad smell out of a punching bag?
Clean the outside correctly and improve ventilation. If the smell comes from wet or contaminated filling, surface spray will not solve it. Contact the manufacturer or a qualified repairer before opening the bag.
Can I repair a torn punching bag myself?
Some small, non-structural shell damage can be repaired with a material-specific kit. Stop using the bag and seek proper repair when the tear reaches a seam, attachment point or exposes fill.
Should I rotate a hanging bag?
Only when the product design and hanging system allow it. A swivel may rotate the bag naturally. Do not force straps or connectors into a twisted position to spread wear.